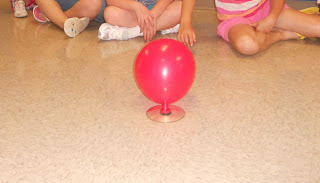
Here is the diagram explaining how the hovercraft worked before we tried it out. That's me at the board! Our hovercraft was made using a CD, bottlecap, and a balloon. It's fairly easy to make (I made ours at home before camp just to ensure it worked- you should have seen how excited I was to try it out ;)
How to make the Hovercraft:
1. Glue a bottlecap on the middle of CD and then put a hole (small) in the bottlecap (I used a nail to do this)
2. Blow up a balloon and put it over the bottlecap and release it on the table/floor
3. Push it gently around!
BEWARE: Your kids may request this millions of times!
It really resembles what an air hockey table feels like. The kids think it's the coolest thing ever!
This would be a great lesson for elementary age students relating to physics, forces, or motion, plus it's so much fun (seriously and I'm not a kid). If not for learning purposes- IT IS STILL FUN!
Hope you get a chance to try this! Let me know if you have any questions!


Looks like they had fun!
ReplyDeleteJourney of a Substitute Teacher
Super fun experiment Amber :) Did it take long to make?
ReplyDeleteI'm a new follower. I think you left comment on my blog but I can't read it for some reason (technology and I have our complex moments) so I'll try again tomorrow xx
Daydreams of a Student Teacher
Thanks for being a follower! It really didn't take too long to make. Building our hovercrafts didn't take too long and the time it did just added to the anticipation but it was was definitely worth it!
Delete